Hello All!
Well it’s the early hours of the first day of August! I can’t believe Christmas in July is over! Even though life got a bit hectic at times in July and it was tough creating a card every day, I have thoroughly enjoyed the challenge I set myself and I know I will be grateful to have all these cards in November when I will need them!
Anyway, as I enjoyed myself so much, I carried on with my Christmas crafting during 31 July so I’m calling this one my Bonus Christmas in July card!
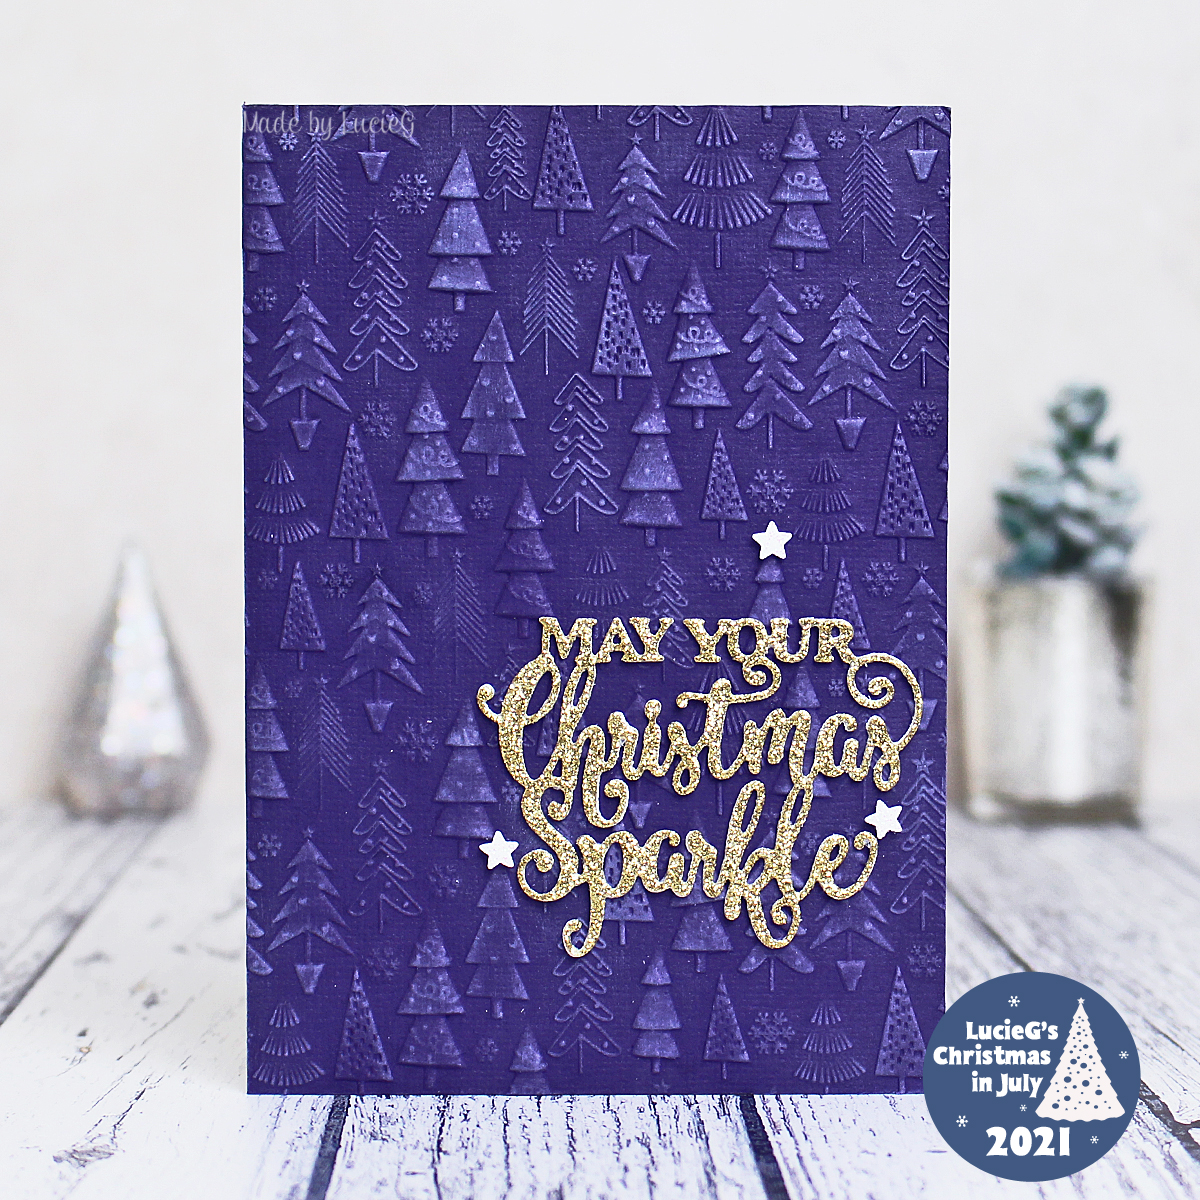
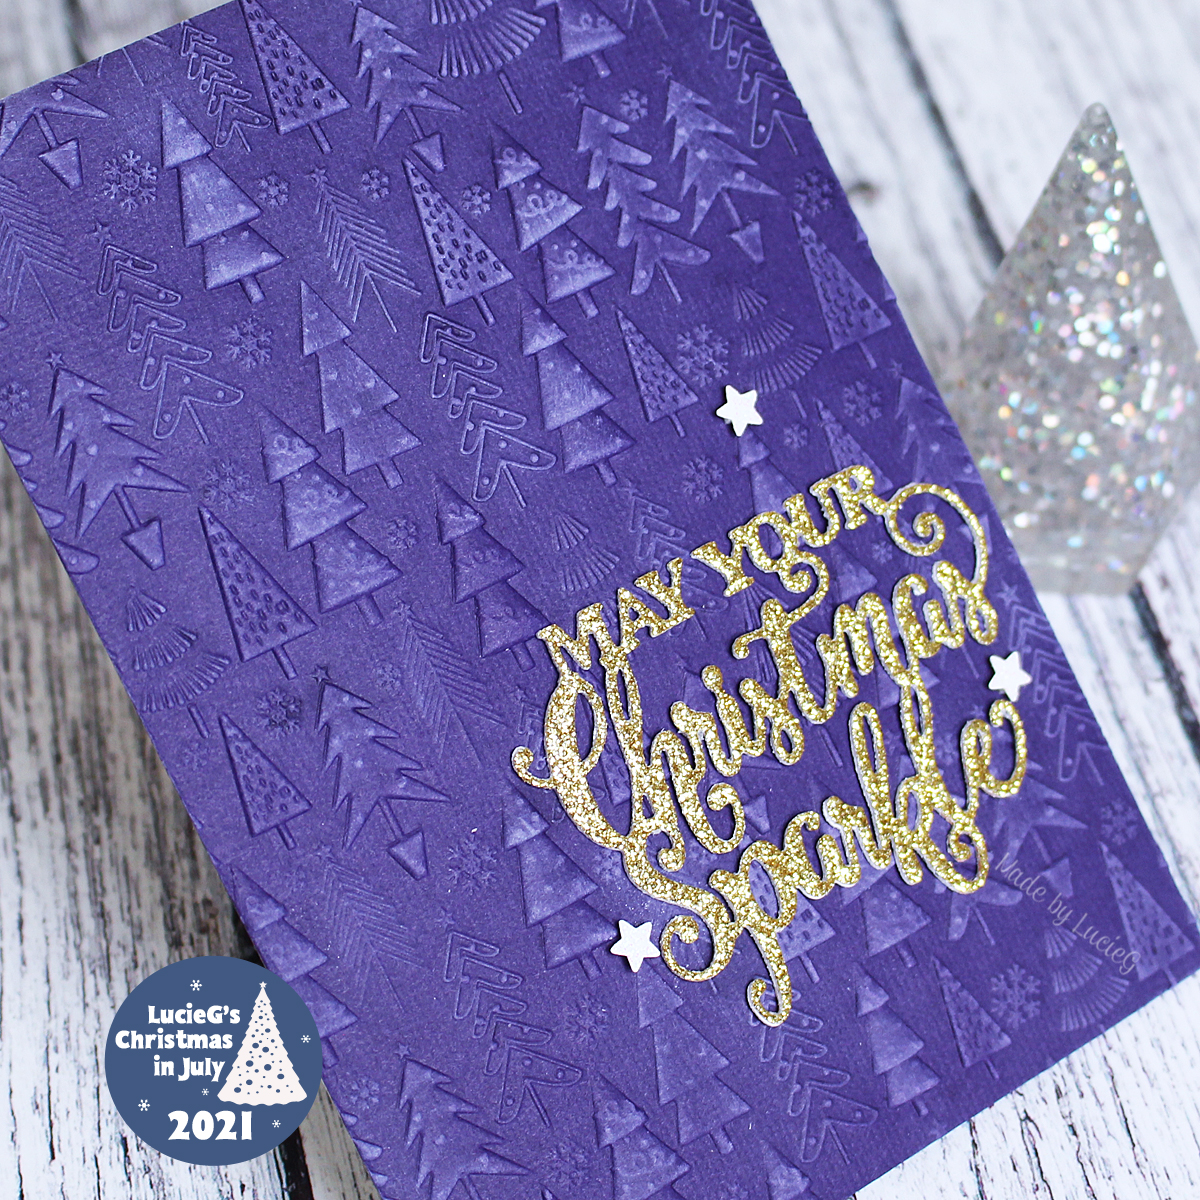
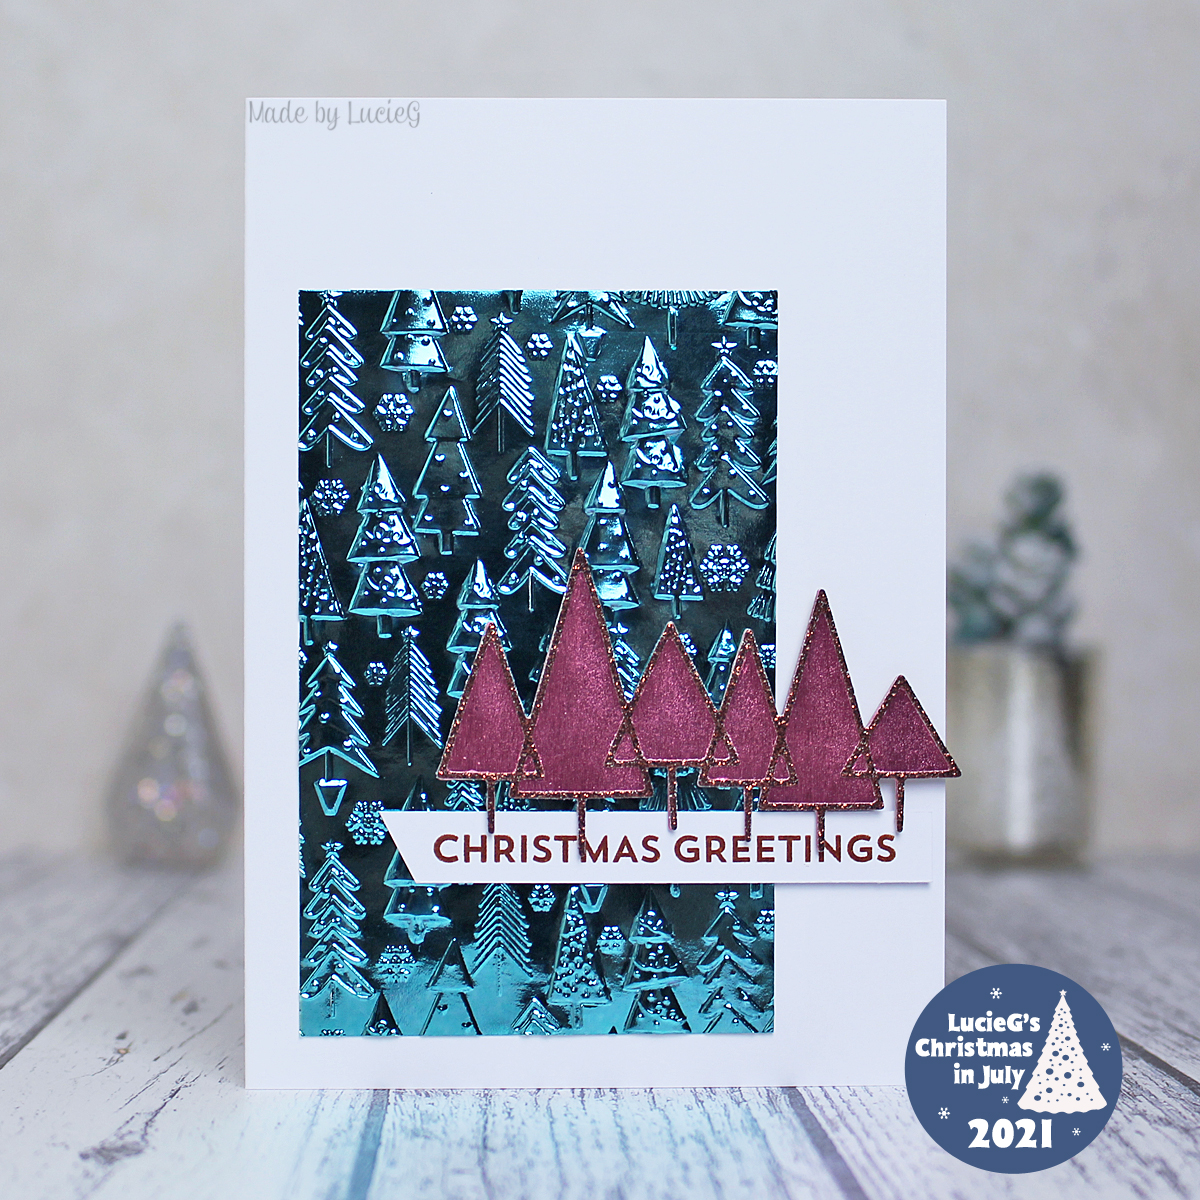
I had to use my favourite Christmas in July purchase – the gorgeous Sizzix 3D Christmas Trees embossing folder! To create the background, I blended some distress oxide ink in the centre of a white panel and applied a generous layer of perfect pearls across it. Then I embossed the whole panel. I coloured and fussy cut my favourite Paper Smooches snowman, adhered him to my embossed base and added a My Favorite Things sentiment on top to complete my card.
I’m adding this to The 12 Months of Christmas Link Up.
Thanks for stopping by!
LucieG.