Technique – dry embossing

Featuring dry embossing

It’s Your Birthday!

Hi everyone!

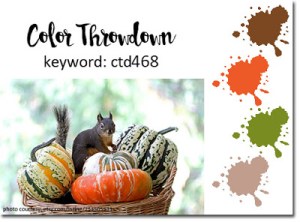
There’s a lovely autumn palette for this week’s Color Throwdown Challenge (brown, orange, green and kraft) but I decided to put them to use on a birthday card, using the sketch from the Freshly Made Sketches challenge.

I embossed an older wood-mounted stamp from Stampendous and then coloured it using my Twinkling H2Os.

I then used a Spellbinders embossing folder on a square of kraft cardstock and stuck it to my base card. I added some paper from My Mind’s Eye paper and the stamped sentiment to finish off my card.

This card came together very quickly… I really wanted to add some orange and green sequins but talked myself out of it as I think this will end up being used for a chap who isn’t that keen on sequins…. or any embellishments!

Thanks for stopping by!

LucieG.
Falling leaves

Hi everyone!

A lot of the leaves have already fallen in my part of the world, but I’m not ready to put away my autumn card supplies!

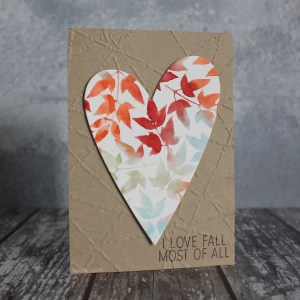
This card was super simple to make! I used a Jennifer McGuire technique that I’ve tried a year ago – I prefer this version!

I masked off my card to create a rectangle and then blended some Twisted Citron and Fossilised Amber distress ink before covering it with Perfect Pearls.

I removed the mask and then ran the whole card through my Big Shot using a Sizzix deep embossing folder.

To finish off the card, I added a few die cut hearts and a sentiment from Simon Says Stamp.

I’m entering this into the current Simon Says Stamp Monday Challenge (Thanks/Thanksgiving), Simon Says Stamp Flickr Challenge (‘Thankful’) and also the Addicted to CAS challenge (‘Leaves’).

Thanks for stopping by!

LucieG.

Autumn colour

Hi everyone!

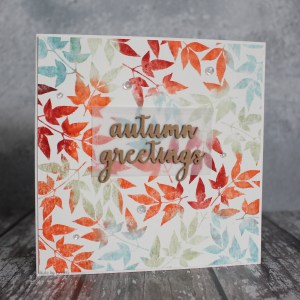
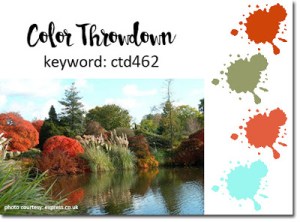
The Color Throwdown challenge has another fabulous colour combination this week – rust, green, orange and aqua! They were such fun to play with and I ended up creating two cards!

I used Impression Obsession’s background fancy leaf stamp with distress inks for both cards. For the first card, I trimmed down the background to fit a card base and simply added a rectangle of vellum and a Memory Box sentiment die. I added a few sequins to finish it off.

For the second card, I embossed a piece of cardstock using a Spellbinders embossing folder. I cut my stamped panel with an Essentials by Ellen die and then added a Concord and 9th sentiment.

Thanks for stopping by!

LucieG.

Kaleidoscope card

Hello everyone!

I loved seeing how the super-talented Debby Hughes used the Simon Says Stamp Kaleidoscope stamp and she was my inspiration for this card.

After embossing the image in white, I coloured over it with four distress inks (spiced marmalade, picked raspberry, abandoned coral and frayed burlap) and then added a coat of Gansai Tambi light gold. It created such a fabulous shimmer! I’ll definitely be using it more often!

I added some vellum and a yellow/orange panel that I had embossed with a Studio Carabelle embossing folder. I added a Lawn Fawn sentiment and lots of sequins to finish it off!

I’m entering this into the current Case This Sketch challenge and also the Simon Says Stamp Flickr challenge – ’emboss like a boss’!

Thanks for stopping by!

LucieG.
Yay! You did it!

Hello everyone!

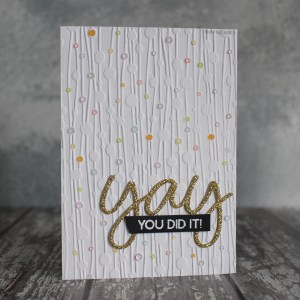
For today’s quick card, I used a Studio Carabelle embossing folder together with a Cathy Zielske/Simon Says Stamp die.

I added lots of Nuvo Jewel drops but felt my card still needed a little something extra, so I added a Neat & Tangled sentiment which I embossed onto black card using some Hero Arts white detail embossing powder.

I’m entering this into the latest Simon Says Stamp Flickr challenge – ‘Emboss like a boss’!

Thanks for stopping by!

LucieG.

You Nailed It!

Happy Friyay!

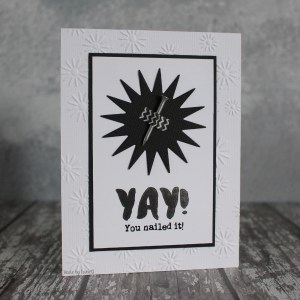
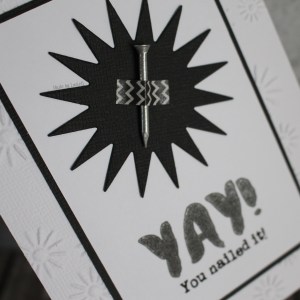
This week’s theme for the Less is More challenge is ‘use a real object’. I’ve been doing a lot of DIY recently so I decided to go with a nail! I wanted to use the phrase ‘you nailed it’ but I don’t have a stamp of that – although I bet I will find it in one of my stamp sets tomorrow! Anyway, I printed it off on white card on my home printer and then stamped the Altenew ‘yay’ above it using Delicata black shimmer ink – it is so shimmery in real life!

I used a die from the Hero Arts 12 point star set as the focal point and then stuck the nail on it using some washi tape…. not sure how long it will hold!

I then stuck the panel on a background that I had embossed with a Sizzix/Tim Holtz folder.

Thanks for stopping by!

LucieG.