Technique – die cutting

Featuring die cutting

Simply thanks

Happy Saturday everyone!

I treated myself to an order from Simply Graphic on New Year’s Eve and it arrived this morning! Super fast shipping from France!

I just had to use my new dies today and here’s one of the cards I made! I used the colour combo from this week’s Colour Throwdown challenge (grey, ivory and black) and added a sentiment die from Mama Elephant.

I’m also entering this into the current Time Out challenge (thankful).

Thanks for stopping by!

LucieG.

Distress crayon new year


Hi everyone!

I’m sharing another New Year card today! I just love creating and giving these cards!

For this one, I pulled out my new metallic distress crayons! I was very pleasantly surprised by just how metallic they are – the Tarnished Brass is definitely my favourite one at the moment!

To create my background, I coated some cardstock with Distress Collage Medium to make it easier to blend the crayons. I had originally planned to use the Peacock Feathers, Broken China and Brushed Pewter crayons but I preferred the look when I substituted the Tarnished Brass for the Brushed Pewter! Anyway, once I finished blending, I cut the background with a Taylored Expressions Background die – as soon as I saw this die, it just screamed ‘New Year celebration’ to me and I was relieved to see how it turned out. Look at that shine from the metallic crayon!

Anyway, I stuck it to a base card and then stamped a Hero Arts sentiment using distress oxide ink (in Peacock Feathers).

I’m entering this into the current Timeout Challenge (new beginnings) and I’m adding this to the Simon Says Stamp Work It Wednesday challenge as I’m using two new items – the metallic distress crayons and the background die!

Thanks for stopping by!

LucieG.

Written in the stars – 2018

Hi everyone!

Happy 2018!

I seriously can’t believe how quickly 2017 disappeared. I’m really happy that I managed to spend a lot of time in my craft room and finally set up this blog! I’m looking forward to continuing my creative journey in 2018 and even hope to start doing some process videos – just got to learn how to do them first! I’ll keep you posted!

For today’s card, I used the fabulous Hero Arts star confetti die. I knew that I wanted to create the ‘2018’ from the stars using the inlaid die cutting technique but I didn’t want to spend ages fiddling with die cut stars. So, I embossed the die onto some white card and coloured stars in pencil, erasing multiple times until I had a pattern that I was happy with. Then I ran the die once through my Big Shot – this was enough to cut the stars and still leave most of them in situ when I removed the card from the die. I stuck it lightly to a card base using Kokuyo tape which I knew would give me the flexibility to remove some of the blue stars and replace them with silver ones.

I used the die with some silver glitter paper and got to work replacing the blue stars with silver glitter ones as per my embossed template. This part was really quick – I’m so grateful I thought of creating a template! I must confess that once I was finished, I stuck a few silver stars on top of the base card to reduce the gaps between some stars and make the numbers clearer.

To finish off the card, I added a Hero Arts sentiment which I had stamped using the gorgeous Delicata blue shimmer ink.

Thanks for stopping by!

LucieG


Bold new year


Hello everyone!

I’m still confused about days…. Crimbo Limbo continues!  But I do know it’s not long until New Year’s Day and so it’s definitely time to focus on a few cards for that holiday!

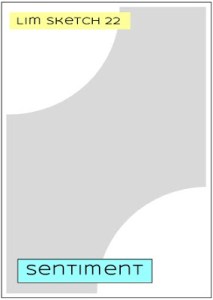
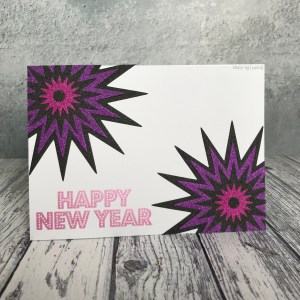
For today’s card, I used the sketch from the current Less is More challenge and the fabulous Hero Arts infinity 12 point star dies with lots of glitter paper!

Whilst this card came together really quickly, I had a moment of self doubt and redid it in landscape rather than portrait, before changing my mind again! Thank goodness that I used the Kokuyo tape to adhere the stars – made them easily repositionable!

Julia shared a great Instagram post today about the trial and error that often go on before we share cards on social media and I remembered other comments from crafters that we rarely see things that go ‘wrong’. I think in 2018, I will share a little more about some of my card mishaps…. and maybe others will do the same….

While this isn’t an example of a ‘mishap’, it is representative of my crafty procrastination, which can be as much of a frustration as a crafty mishap, so I decided to share it!

And what do you prefer, portrait or landscape?

Anyway, I’m also entering this into the Simon Says Stamp Monday Challenge (party) and the Simon Says Stamp Wednesday Challenge (anything goes).

Thanks for stopping by!

LucieG.

Silver Christmas wishes

Hi Everyone!

For today’s card, I pulled out one of the new Hero Arts background dies that I bought with the November kit – isn’t it pretty!

After embossing the image in white, I blended some distress ink over it. I mounted the background onto some coloured card – in real life, the cardstock is much closer to the shade of purple ink I used, honest!

I cut a Simon Says Stamp word die three times – once in silver glitter paper and then twice with plain cardstock and adhered the die cuts together. I added an embossed word banner and called the card finished…. well, almost!

I felt it needed a little something extra so I added some snowflakes from the Simon Says Stamp snowflake banner die as a finishing touch!

I’m entering this into the current challenge over at a Blog Named Hero and also the Simon Says Stamp Flickr challenge (anything goes).

Thanks for stopping by!

LucieG.

Glittering Holly

Hi there!

For my second card today, I wanted to play with some new Nuvo glitter paste that I bought with Christmas in mind. Can’t believe that I didn’t get round to playing with it until a week before Christmas!

Anyway, I chose the sketch from the current Freshly Made Sketches challenge and used a stencil fromEcho Park Paper Company. Lots of masking with this as I masked off the berries when I did the leaves and vice versa. Totally worth it for the effect!

Unfortunately, when I ran this through my Big Shot, it flattened/dulled the red berries a little – I think the paste may have still been a little damp, althought it felt quite dry to me. Anyway, I popped a little bit of red Nuvo drops on top of each of the berries to make them glisten again! I actually really like the effect, although it did take quite a while to dry!

I added a couple of strips of patterned paper and a die cut from Concord and 9th to finish it off!

Thanks for stopping by!

LucieG.