Hello everyone!
Today I’m sharing cards I made with some products kindly sent to me by Penny Black from their new All Smiles release. This is a truly gorgeous release with some amazing stamps and dies. I was very excited to play with the teacups and flowers stamp sets – although I have to confess that I was a little apprehensive about colouring the larger images. But having spent a lovely morning with my paint brush, I think I had just fallen out of practice with water colouring! Before I started, I decided that I wouldn’t put any pressure on myself to create a specific card and would just practice with my different watercolours, card panels and paint brushes. It was such a relaxing time and I surprised myself with some images that I felt comfortable including on a card. So if you’re feeling like me, just focus on enjoying the colouring process and you may surprise yourself!

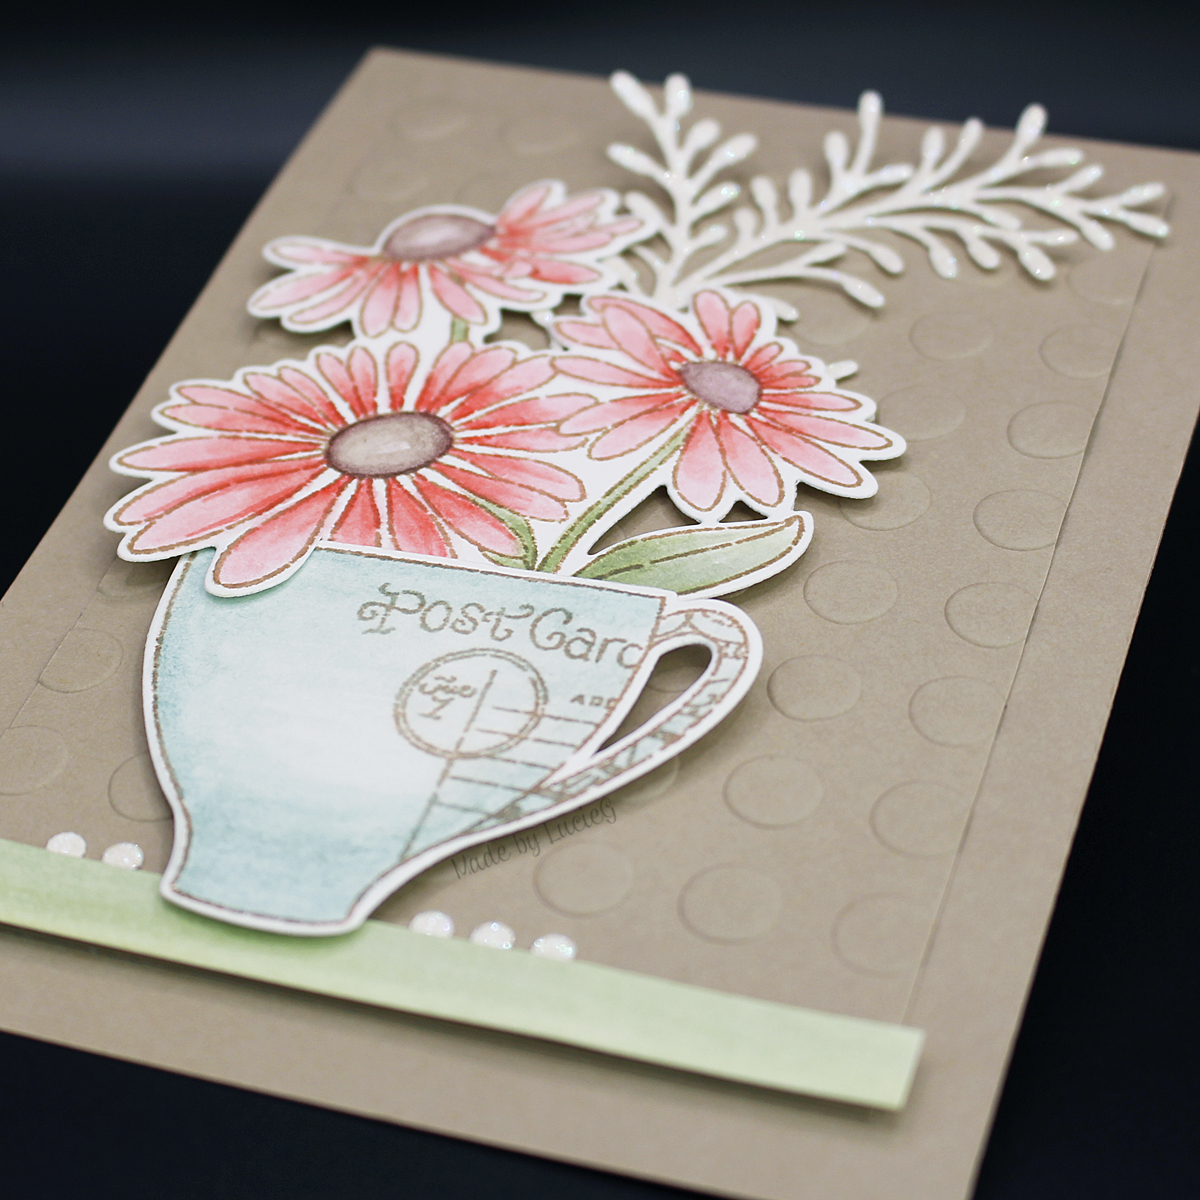
So onto the cards! First up is a card using a cup from the Brew-tea-full stamp set (31-063), cut with the Brew-tea-full Cut Out co-ordinating die (51-823) and coloured with a liquid watercolour. I love all the blooms in both flower sets that are in this release but in the end I chose to use the daisies from the Blooms stamp set (31-064) that I had coloured with a distress reinker. I cut the image with the Blooms Cut Out coordinating die set (51-824).
For the background, I embossed a panel of coloured card using the Rounded embossing folder (65-016), adhered it to a card base cut from the same colour card. Once I adhered the images, I felt it needed a little something extra so I added a branch, Airy (51-423), cut from glitter card and a small strip of green to ground the cup.

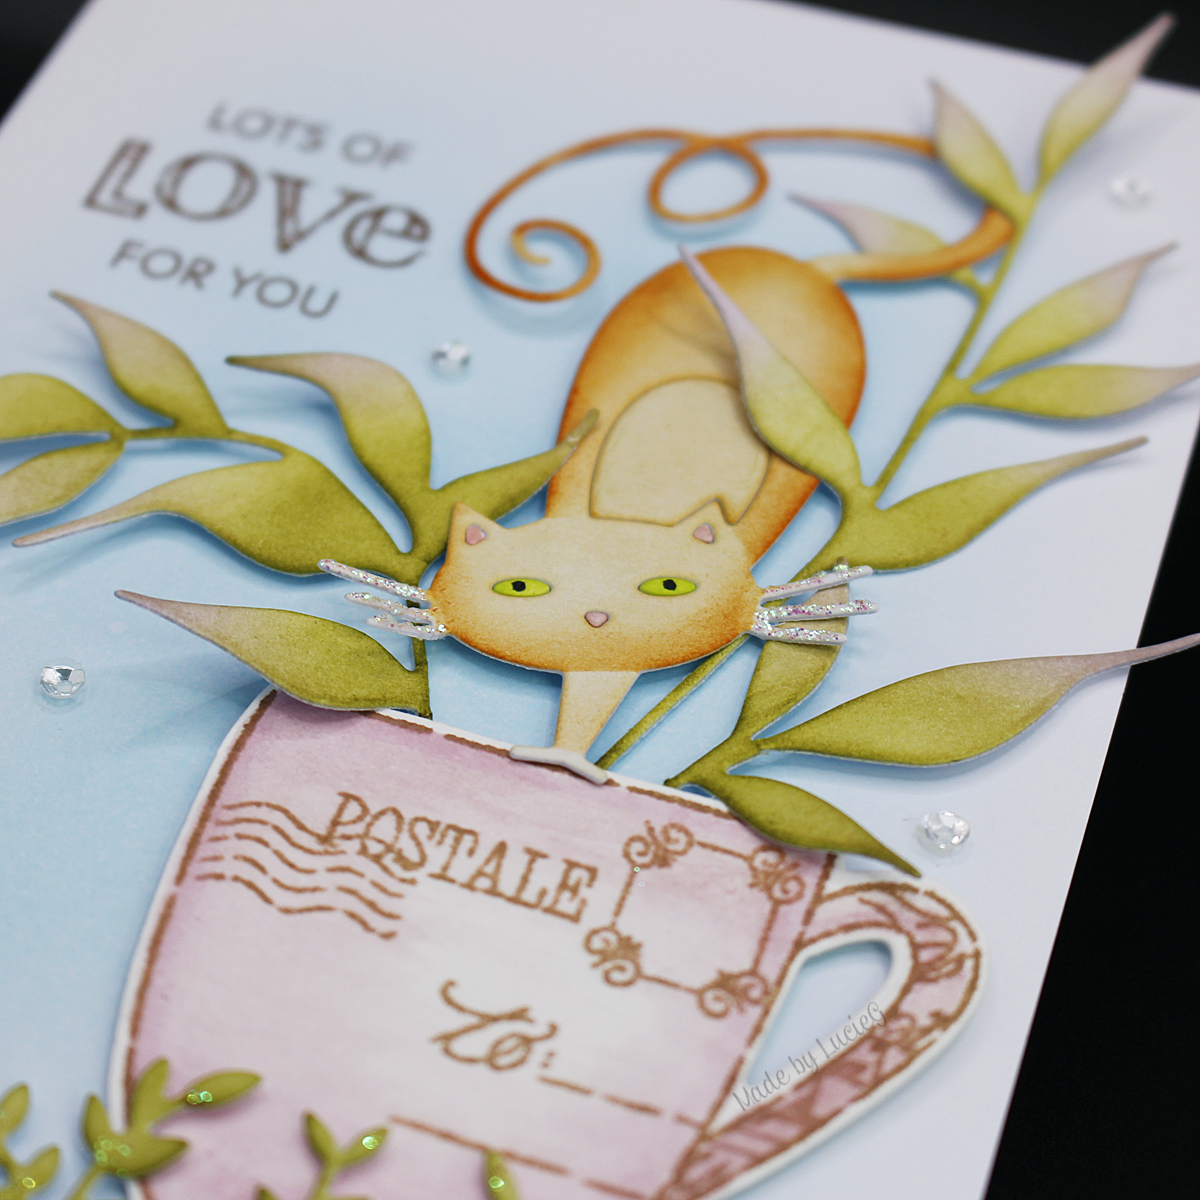
My second card also uses a cup from the Brew-tea-full stamp set (31-063), cut with the co-ordinating die (51-823) and coloured with a distress reinker. This time I wanted to do something a bit different, so used a Penny Black stamp from a few years ago as my inspiration – the stamp is called Sweet Sip (30-905) you can see the card I made with that fabulous image here.
I chose a kitty from the fun Fancy Cat dies set (51-347) and the gorgeous Dignified die (51-821) and coloured them with distress inks. I blended some Tumbled Glass distress ink on my card base and adhered the elements – I ended up separating the leafy branches when arranging the elements in my teacup. I added a leafy border from the Garden Edgers die set (51-549) to ground the teacup plus a sentiment from the Love & Light mini stamp set (31-037) and some stickles and sequins!
Thanks for stopping by!
LucieG.