Hello everyone!
Do you ever see one particular product and KNOW how much you could do with it? I do, but I often don’t get round to turning all my ideas into reality.. or they don’t turn out quite how I had intended! But today I’m sharing cards I made with the new Trim A Tree die set (51-795) as well as other products kindly sent to me by Penny Black from their new ‘Christmas 2024 – Round 1’ release (and a few older products too!). This is such a fabulous release with some amazing products that I was excited to create with, but the stand out product for me was the little chubby tree die that was included in the Trim A Tree set.
You know I love a lot of the tree dies that I see but this one in particular looked like it was the perfect size and style to use in so many ways….
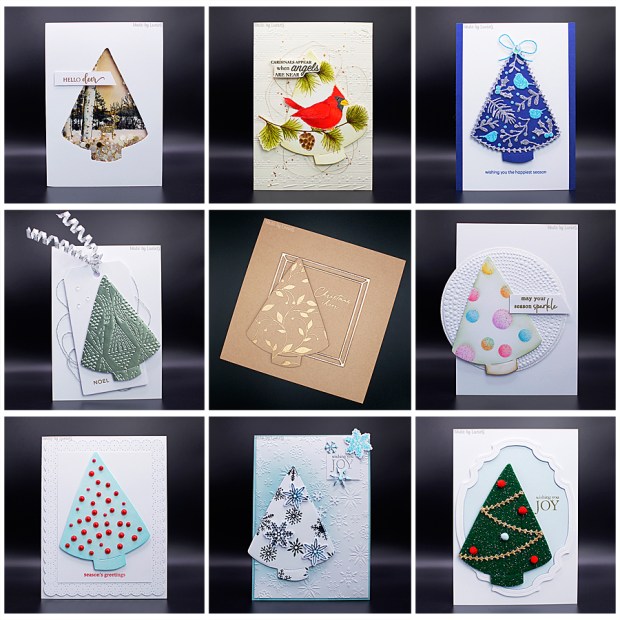
So here goes… warning this is a LONG post, although I would say I actually restricted myself to nine cards as that is what would fit nicely into a square collage!
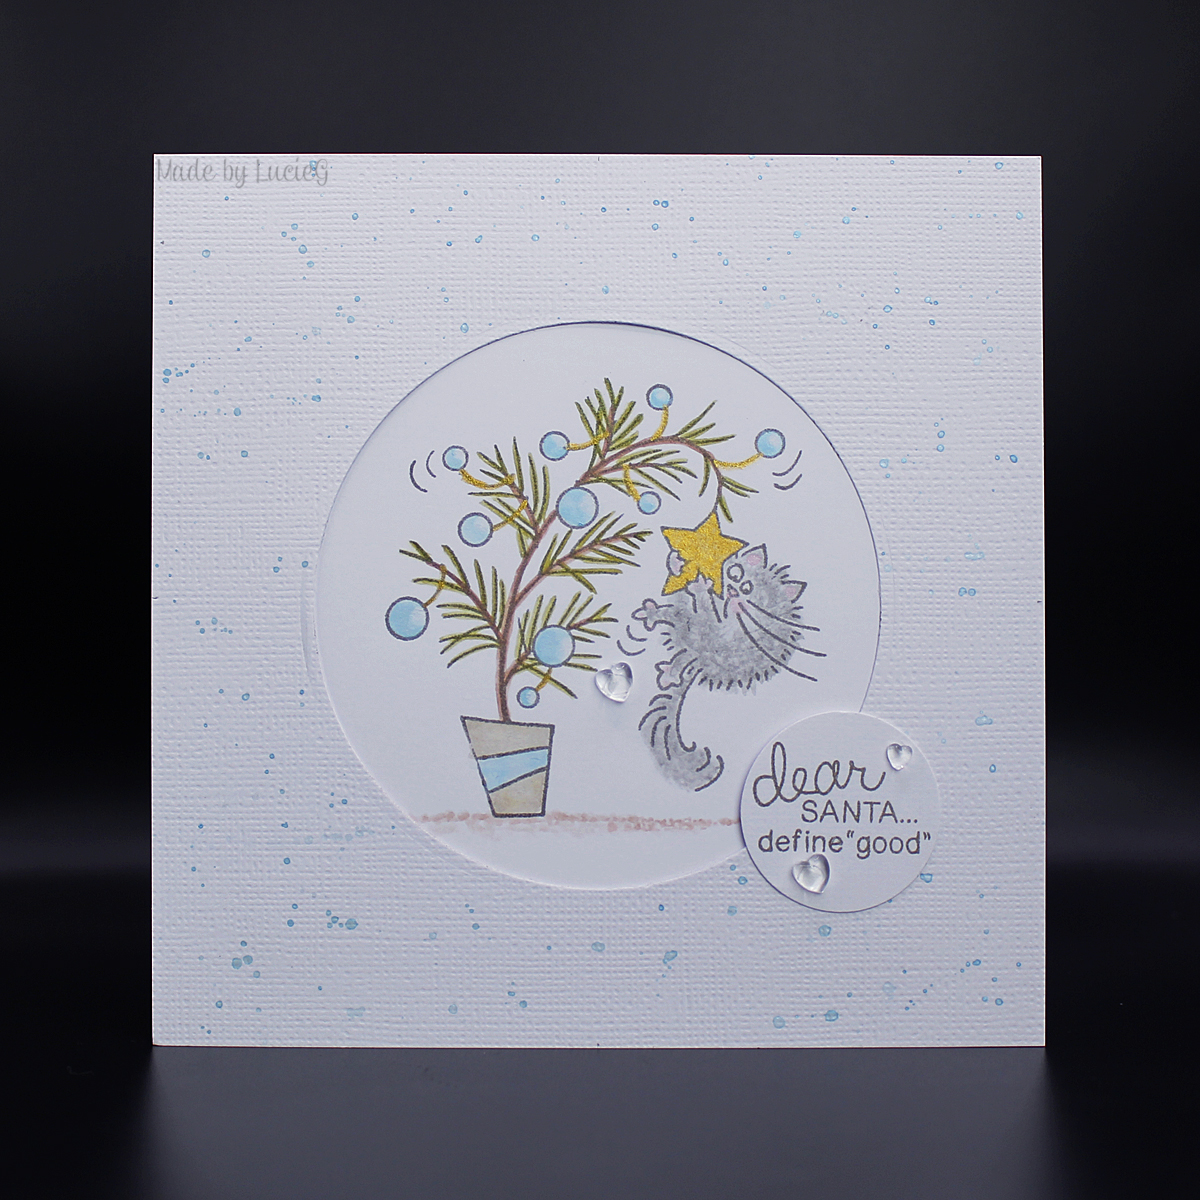
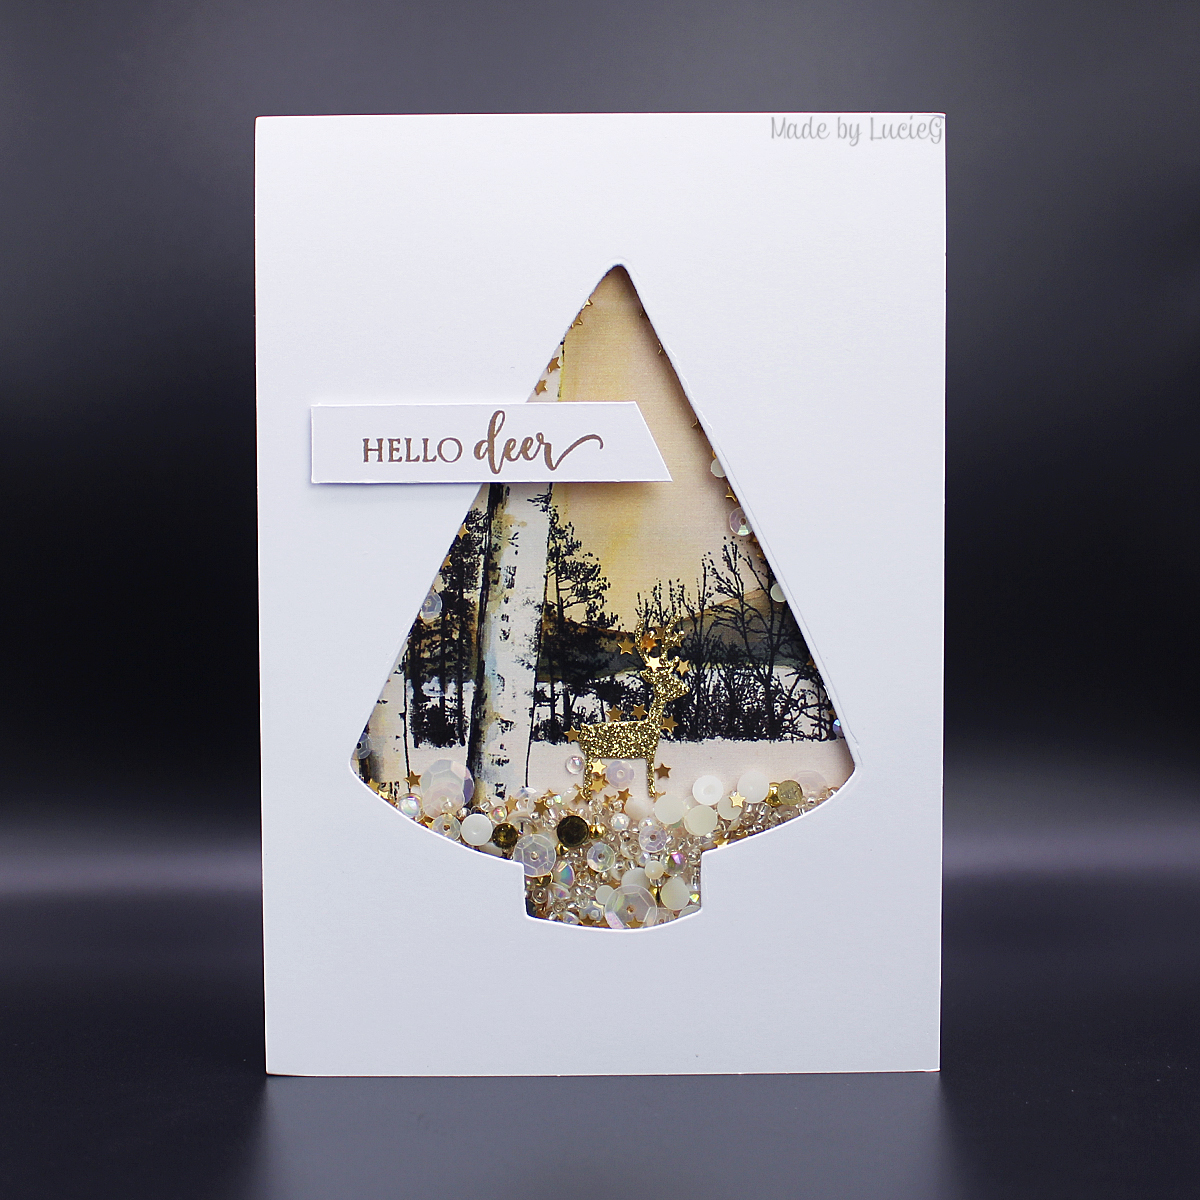
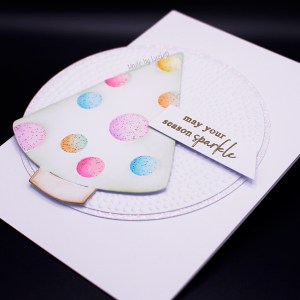
The Shaker One
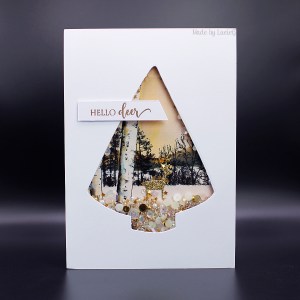
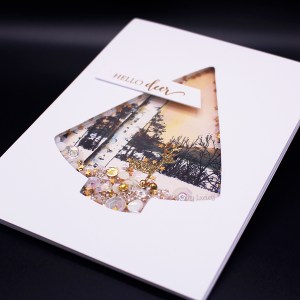
I rarely make shaker cards but the chubby tree’s outline makes for an easy shaker card. Here I used it with the following products: background – Masterpieces Made Simple Card Toppers Snowfall Serenity (50-002); sentiment – Hello Deer mini stamp set (30-766); golden deer die cut – Moonlit die set (51-663).
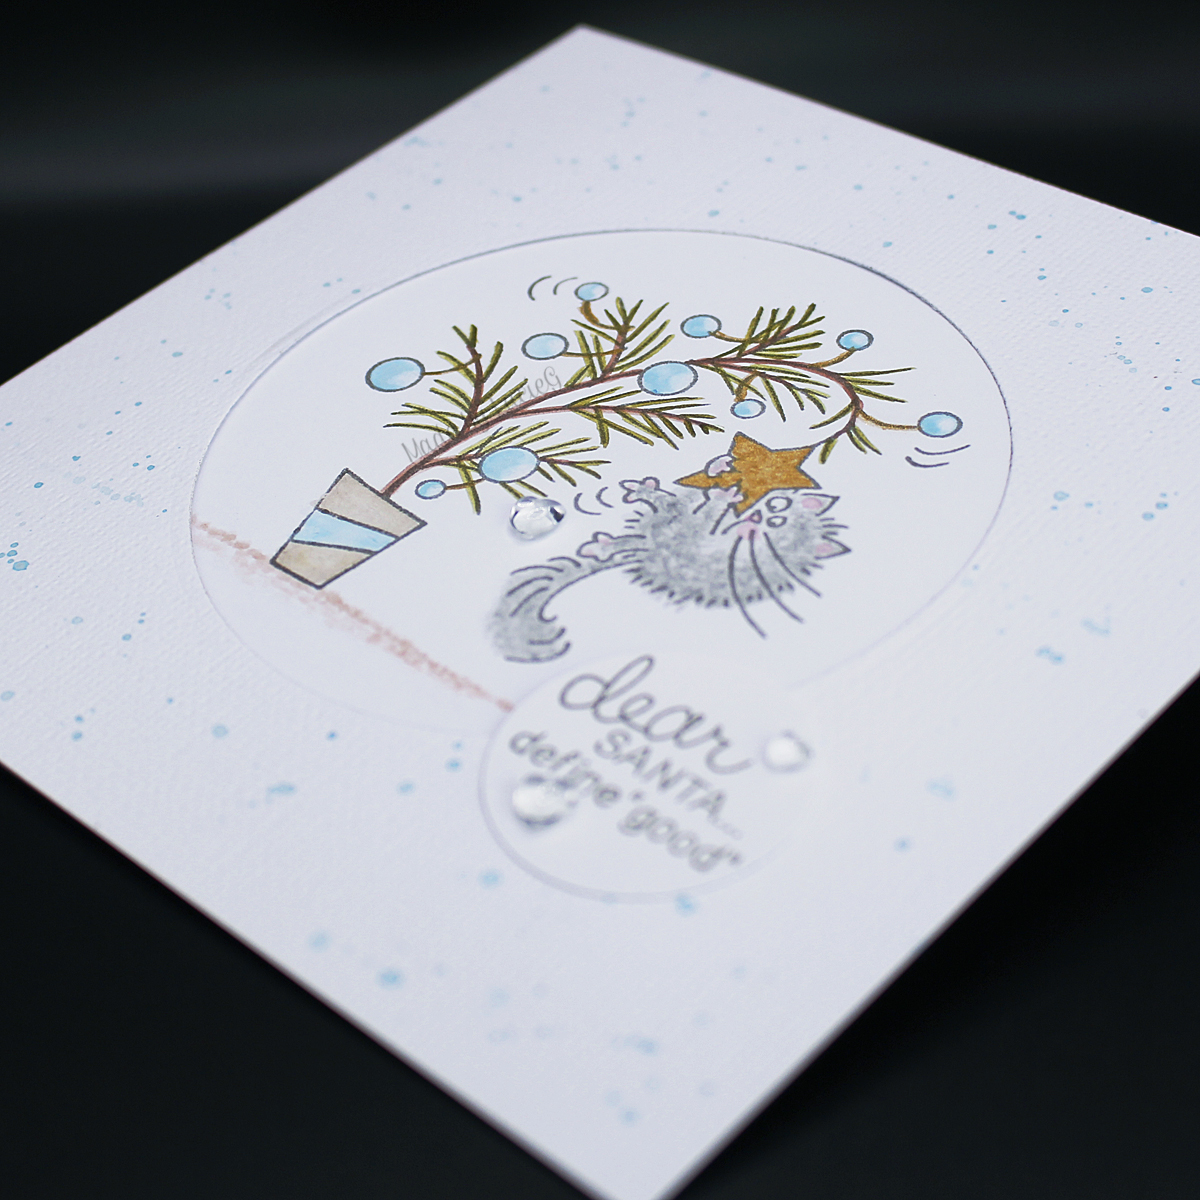
The Stamped One


For this card, I traced the outline of the tree onto watercolour card, stamped the cardinal/branch image a couple of times and coloured it with distress reinkers. Once dry, I die cut it using the partial die cutting technique so part of the branches extended beyond the outline of the tree. All products used for this card are from this new release: cardinal/branch image and sentiment – Messenger stamp set (31-085); Melody embossing folder (65-006).
The Small Die Cut One
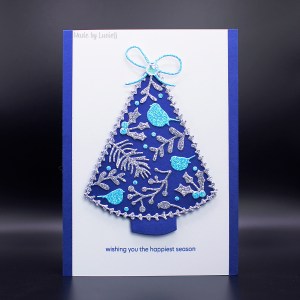
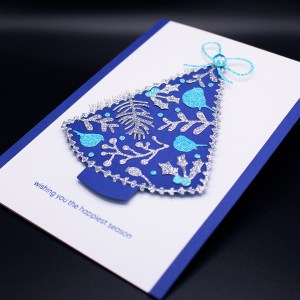
I cased one of my own cards for this design and made use of a LOT of different small dies – including some from a tropical flower set which were the perfect size for my little chubby tree! The garland from the Trim A Tree set is slightly curved, but easy to bend, especially when using glitter paper so I used that to edge the tree. The sentiment is from the new Jolly Builder stamp set (31-066) and the dies are from the following sets: Berry Basket (trimmed branches) (51-796); Nestlings (birds) (51-755); Decorated (trimmed holly) (51-661); Stocking Stuffers (trimmed pine branch) (51-747); Joy of Giving (trimmed bow) (51-748); Tropical Paradise (flower elements used as berries) (51-643).
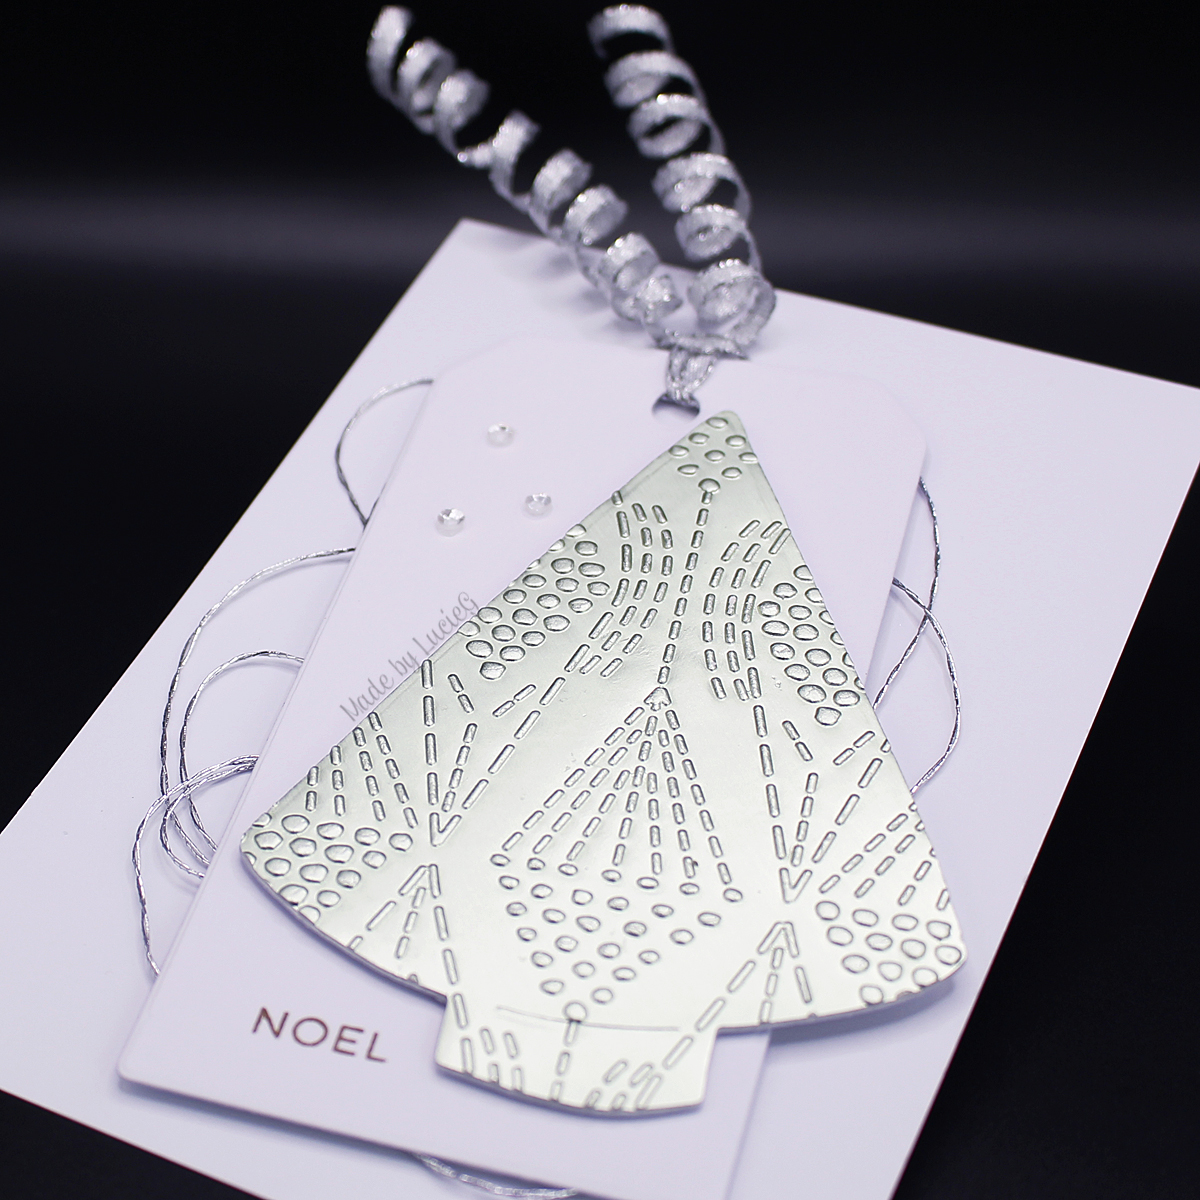
The Dry Embossed One

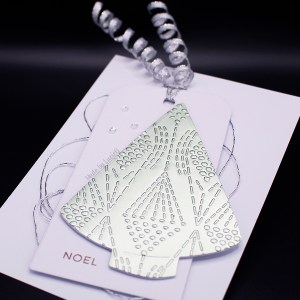
Would you believe that this was the most challenging card for me to finish? The tree itself was easy to emboss using some matt mirror card and a wonderful folder from an earlier release but I struggled with a card design that wouldn’t detract from the fabulous embossing. In the end I chose a very simple tag-based design with some wired ribbon and silver thread. The products used for this card are: Dots and Dashes embossing folder (65-020); Tagged die set (51-007); Holiday Snippets stamp set(30-307).
The Heat Embossed One

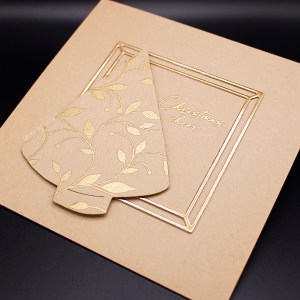
I have some fabulous kraft/foiled cardstock which served as the inspiration for this tree. I heat-embossed a background stamp and part of a sentiment for this card and used the following products: Verdure cling stamp (40-472); sentiment – Festive and Feathery mini stamp set (30-926); Framed die set (51-622).
The Stencilled One

This was so much fun! I used regular distress inks with the stencil and then applied a layer of distress sparkle texture paste on top. The sparkle is amazing! Once dry, I die cut the tree and added it to a dry-embossed circle. I used the following products for this card: Stencil – Dotlets (25-007); embossing folder – Encircle (65-009); sentiment – Festive and Feathery mini stamp set (30-926).
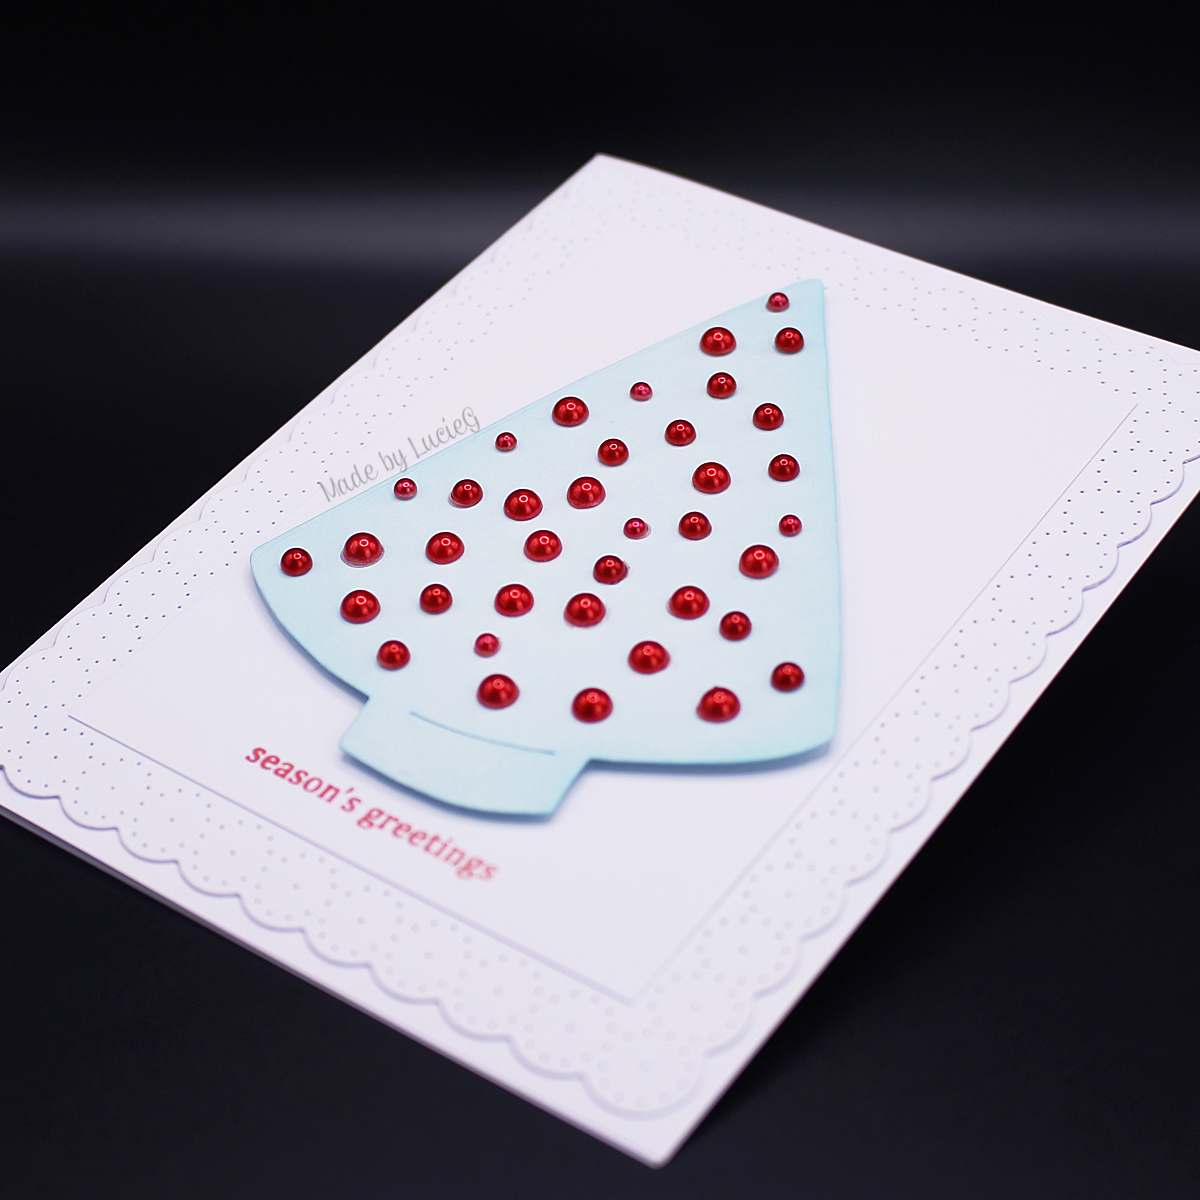
The Be-pearled One
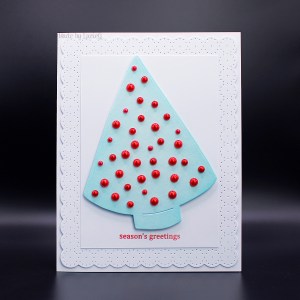

I actually let go of my perfectionist tendencies for this super simple card! I die cut a tree from coloured cardstock and added a little distress ink to darken the edges. I then dropped lots of pearls onto it and just stuck them where they fell… OK I turned them the right side up and filled in two gaps – but only two gaps!! The other products used here are: sentiment – Nature’s Rubies mini stamp set (30- 937); background – All in One Oval die (51-815).
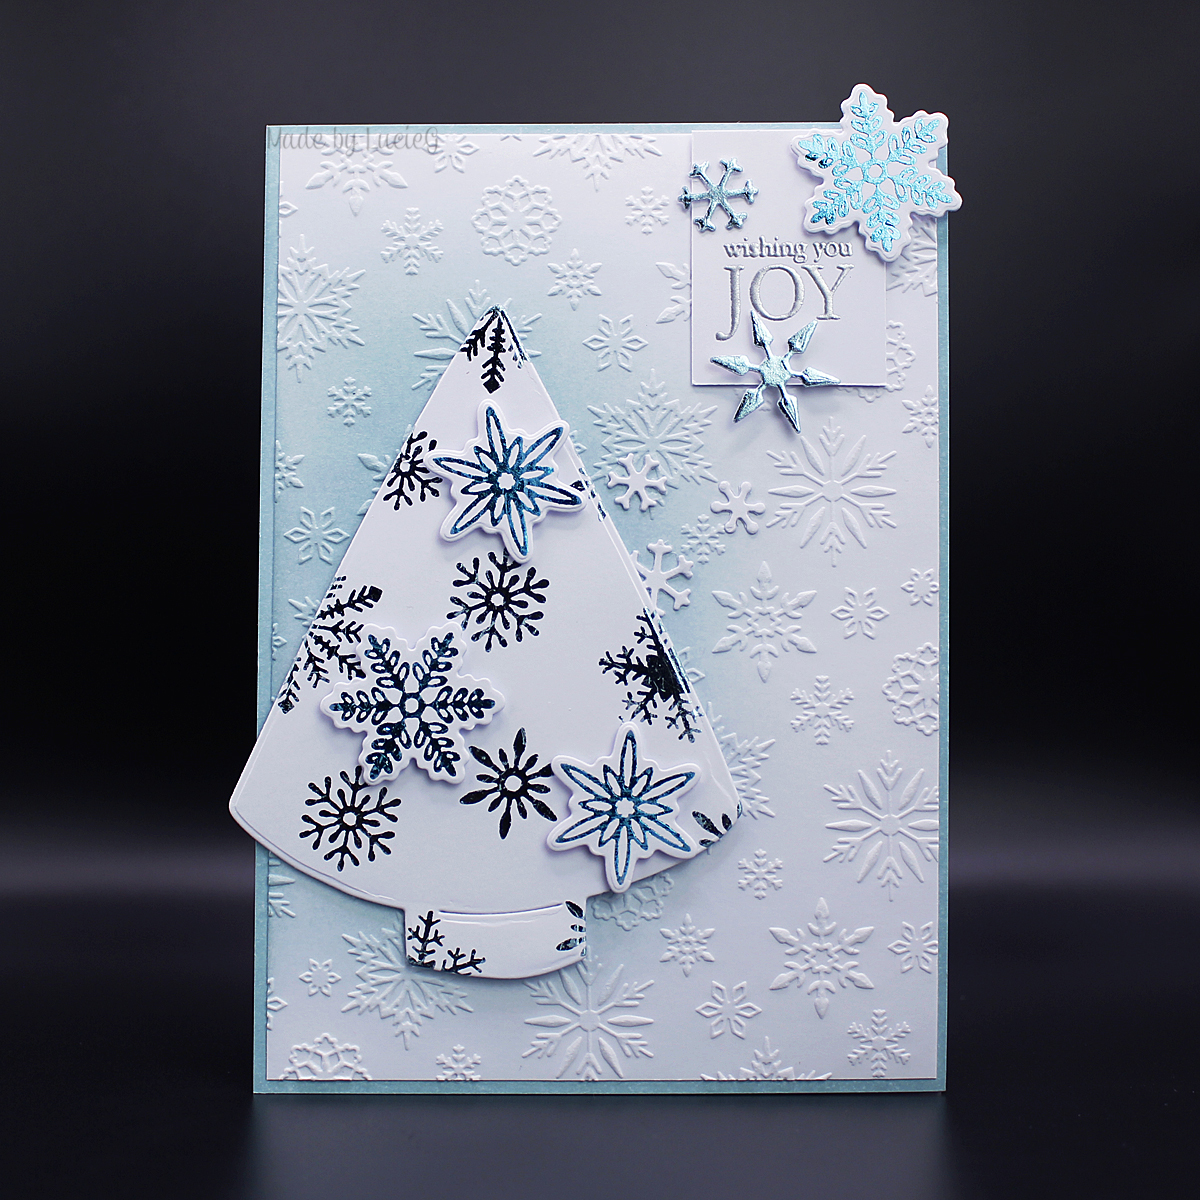
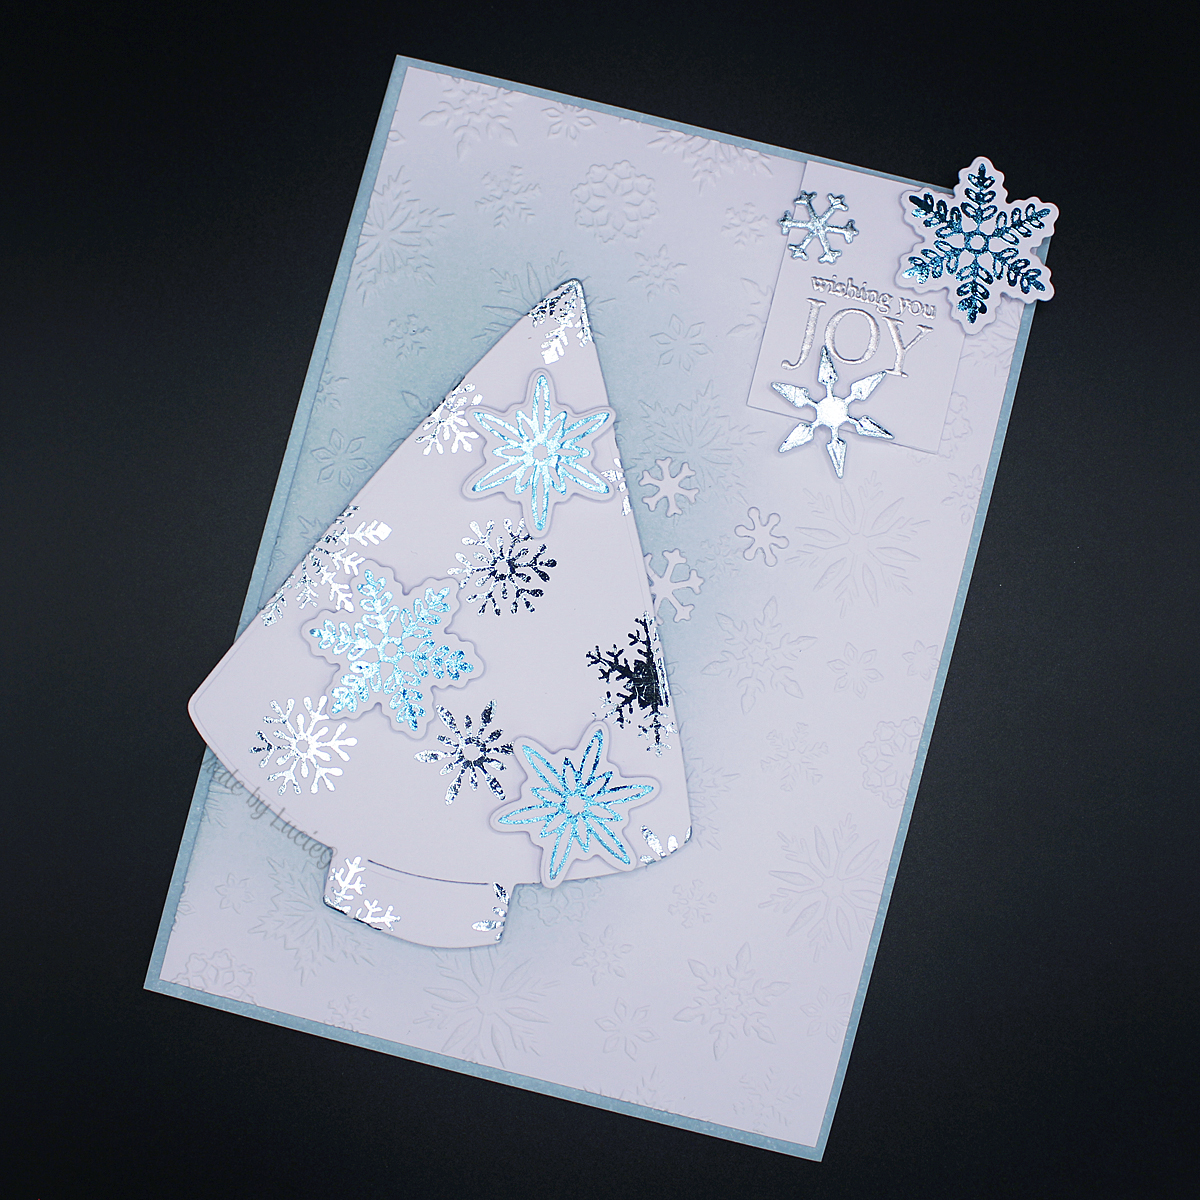
The Foiled One


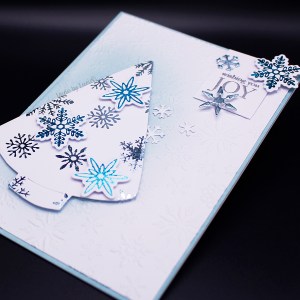 I used new Stick & Shine snowflakes and coordinating dies for this card together with Stick & Shine snowflakes that Penny Black released last year. It’s so shimmery in real life!! I also found that I got a crisper image with my foiling if I used my finger to gently apply the foil rather than using the applicator (which I used to transfer the snowflake design to the card). I originally stamped the sentiment in the same ink that I used for the blending behind the tree, but it was too light and seemed to disappear when I tried to photograph it so I heat embossed it instead using some silver powder.
I used the following products: Snowflakes Stick & Shine (15-020) and coordinating dies (51-834); Snow Shimmer Stick & Shine (15-009); Blooming Stick & Shine foil (21-003); Classics Stick & Shine foil (21-002); Stick & Shine applicator tool (21-001); die cut snowflakes from Snow Family die set (51-395) and Dancing Snowflakes die set (51-708); sentiment – Fragile stamp set (31-087); embossing folder – Blizzard (61-013).
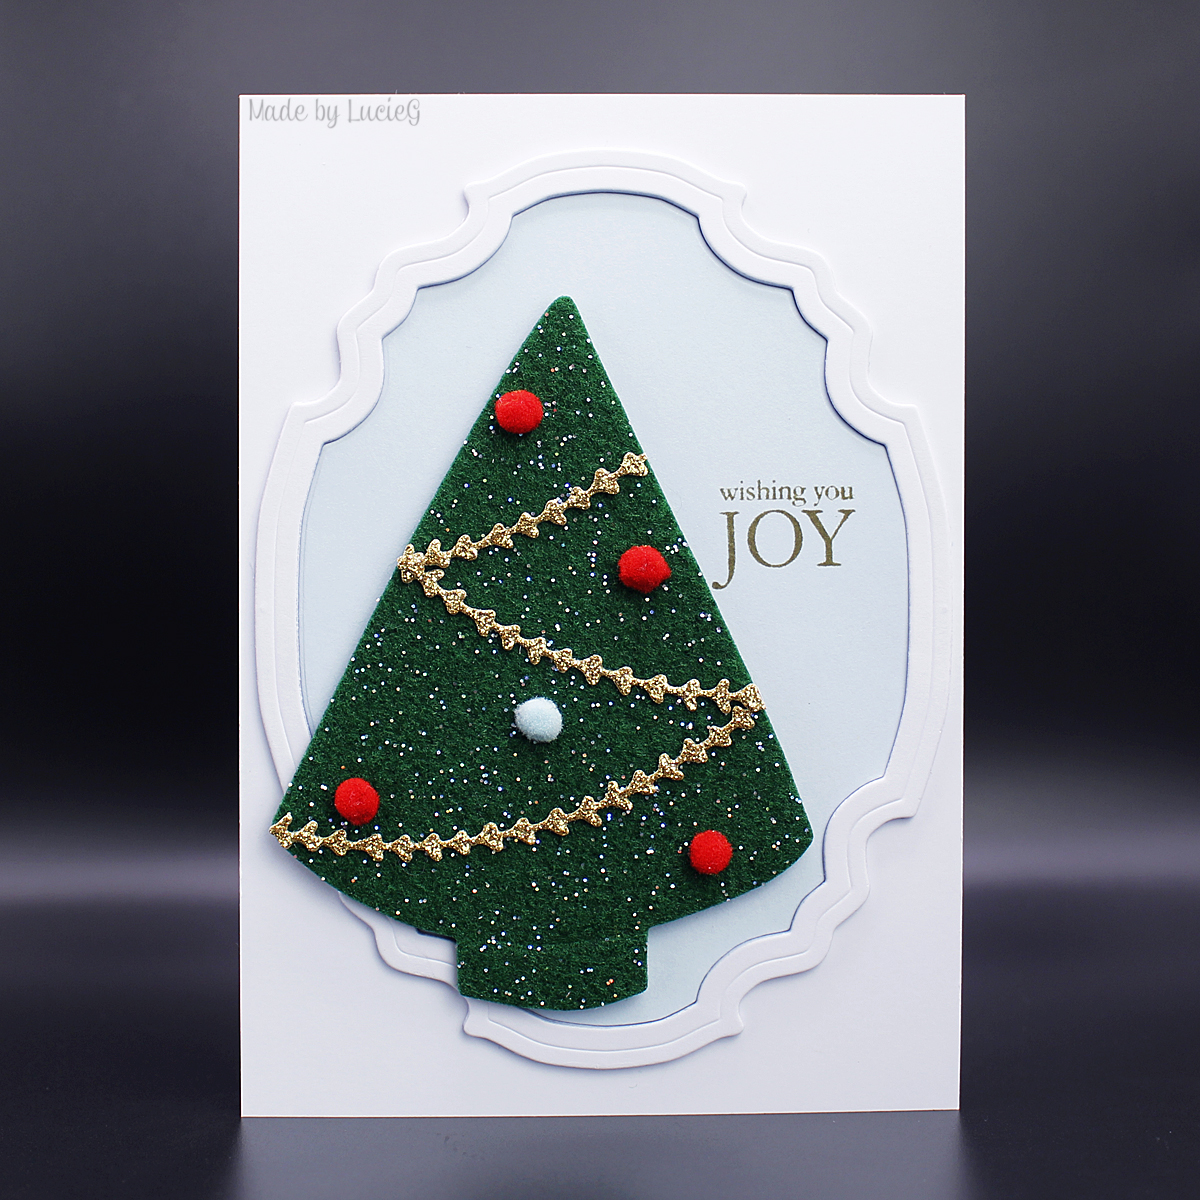
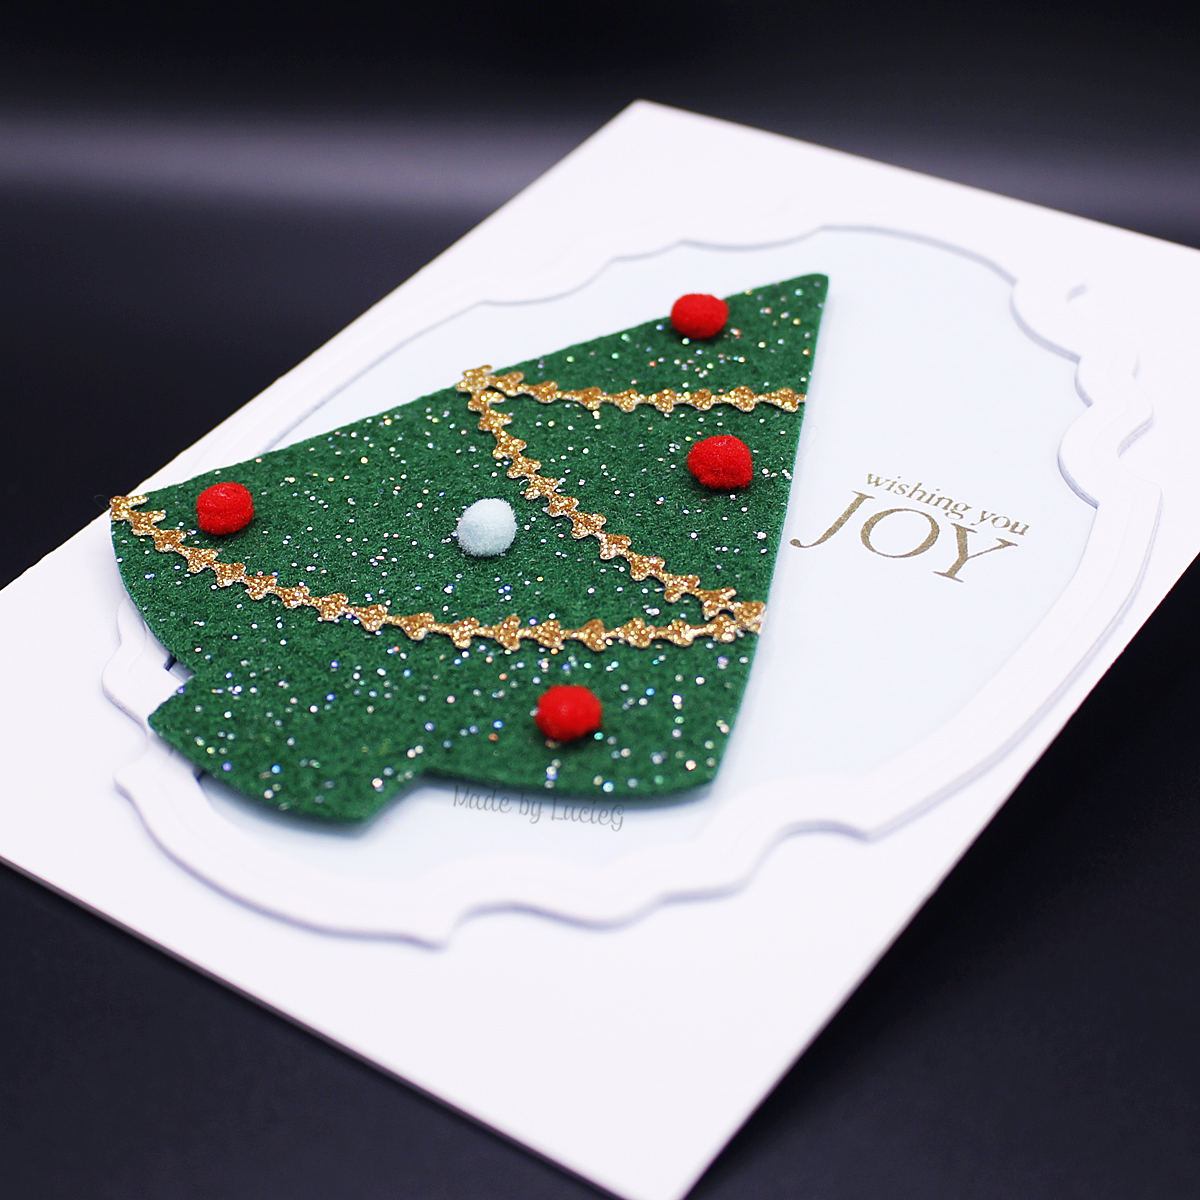
The Simple One


Last but not least (for today) is a card made with trimming from the tree die set and one of the additional new die sets included in this release. It was fun to use some glittery felt and mini pom-poms that I’ve had for a while now. Mind you, it was very difficult to get a decent photo of the card – the tree is too dark in my first photo and then the coloured cardstock has completely faded away in the second shot. I will try to take some more photos in natural daylight I think… Anyway, the other products used here are: Classy Frames die set (51-826); sentiment – Fragile stamp set (31-087).
And that’s it (for now). If you’ve made it this far through the epic blog post, well done and thank you! I absolutely adore this tree and I’m sure it will be popping up again very soon!
Thanks for stopping by!
LucieG.