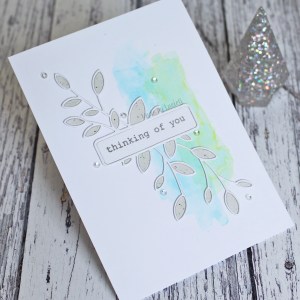
Antique leaf

Hi Everyone!

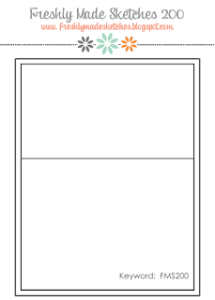
Today, I’m playing along with this week’s Freshly Made Sketches challenge where their 400th anniversary celebrations continue!

This week’s sketch was the one used for challenge number 300…. and when I saw it, I thought of a Clearly Besotted die that would work perfectly with the design. But the more I thought about it, the more it felt really familiar…. so I went back and checked – FMS challenge number 300 was in August 2017, after I started playing along with the challenge, and blogging! And of course, I had used that very die back then! My entry is here if you want to check it out!

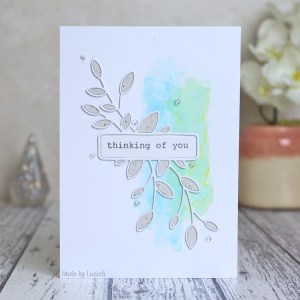
So, for today’s take, I did something a bit different – controlled ink smooshing instead of two paper panels. Then I added a new die cut – this is the Antique Leaf Label die from Memory Box. I have loved this die for a long time and I’m glad I finally took the plunge and bought it this week! The sentiment is also by Memory Box.

Thank for stopping by!

LucieG.

Color Throwdown Guest Designer Week 3

Hello everyone!

This month, I have the honour of being the Guest Designer over at one of my favourite challenges, the Color Throwdown. I’m beyond thrilled!

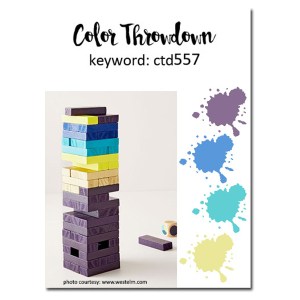
This week’s colour pallet is amazing – purple, blue, turquoise and… yellow! Wow… the idea of yellow and purple really threw me for a bit! 

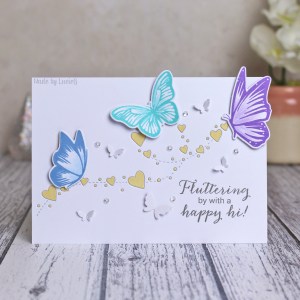
I was originally thinking of a geometric-type design, probably because of the inspiration photo I think… but in the end I decided to break open my favourite Avery Elle butterflies for the first time in maybe a year! I stamped three images using Gina K inks (Wild Lilac, Powder Blue and Turquoise Sea), added some accents with my Prismacolor pencils and then cut them with the coordinating dies.

I decided to use yellow as an accent colour. I cut a white panel with the Simon Says Stamp Heart Breeze die – an oldie but a goodie! I adhered the panel to my card base and then inlaid hearts and dots which I cut from an ink-blended piece of card (I used Gina K Sweet Corn ink). I adhered my butterflies and stamped a Penny Black sentiment before adding a few small die cut butterflies and sequins to complete my card.

For full details of how to enter this week’s challenge, please head over to the Color Throwdown challenge blog. As usual, the design team has some amazing inspiration:

Amy Rohl

Amy Rysavy

Barbara Anders

Broni Holcombe

Jodi Collins

Lisa Henke

Lori Tecler

Lynn Put

Vickie Zimmer

Wanda Cullen

Thanks for stopping by!

LucieG.

Santa’s sleigh

Hi Everyone!

Today, I’m playing along with this week’s Freshly Made Sketches challenge where their 400th anniversary celebrations continue!

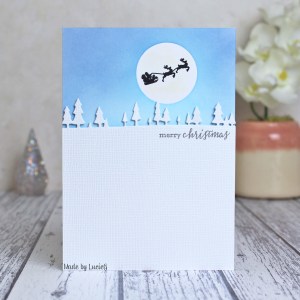
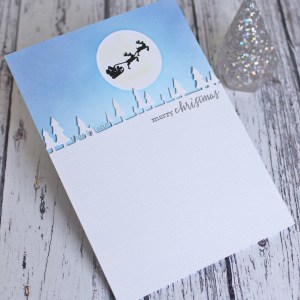
This week’s sketch was the one used for challenge number 200…. and it’s really minimalist! I decided to make another festive card, using a die I had forgotten – the Pine Tree Border from Poppystamps, dated 2011! Hard to believe that’s 8 years ago now! Anyway, I cut a panel of white card using the die and stamped a Clearly Besotted sentiment. I then masked off a circle on my card base and blended some distress inks to create a night sky. Maybe I should have gone a little darker, but let’s just imagine that the bright moon is making the sky seem blue, ok?!

I removed the masking paper and dabbed on a little watered-down distress ink to add some depth to the moon. I then stamped a Clearly Besotted Santa image over the moon. Finally I added my die-cut panel to my card base using some foam tape et voila, another Christmas card done! Yay!

Thank for stopping by!

LucieG.

Floral Stem Collage


Hi Everyone!

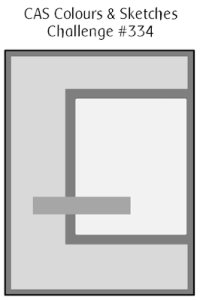
I’m playing along with the current sketch challenge at CAS Colours and Sketches. I decided to use a new-to-me die, the beautiful Floral Stem Collage from Poppystamps. As the flower bends into the right of the frame, I flipped the sketch and lined the die cut on the left side of my card!

I coloured the die cut with my Twinkling H2O paints before adhering it to a piece of Basic Grey paper. After adhering the die cut to my base card, I added a stamped sentiment from an older Hero Arts/Basic Grey collaboration set.

Thank for stopping by!

LucieG.
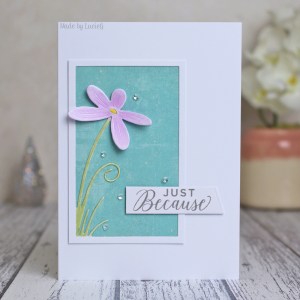
Sunshiny Day

Hi there!

It’s time for a new challenge at AAA Cards! This fortnight we’re challenging you to use one edge of your card only and the optional twist is ‘inspired by a song’. Our sponsor is CASual Fridays

When I saw the optional twist, I thought of a set, called My Sunshine, that I bought on sale from Simon Says Stamp. It contains quite a few song lyrics  and I thought this lyric from ‘I can see clearly now’ would work well along the edge of my card. Who remembers that song? I know the Jimmy Cliff version and remember when it came out over 25 years ago!

I decided to use a light blue card base and inked up the large sun image from the set using a couple of Distress Oxide inks (Squeezed Lemonade and Wild Honey). I was so pleased with the ink coverage – the colours seem to be pretty vibrant and yellow, even though I didn’t use a white card base.

This card is super simple and came together so quickly! Once I stamped the image and sentiment, I added some sequins to help guide the eye along the edge! A few understated embellishments are fine, as long as they support a CAS design!

My team mates have come up with some beautiful cards which are on the AAA Cards challenge blog. We are also joined by the talented Angie from Cimba Creative Fun – I love her card – you must check them out!

Thanks for stopping by!

LucieG.

Winter Wonderland

Hello!

I’m here with my first Crafts-U-Love DT post for September.

This month, I received a couple of products by Studio Light, the Essentials Clear Stamp Set – No.393* and the A6 Paper Pad – No.121* plus the Eleganza Craft 4 mm Glitter Gems – Silver* .

Unfortunately, only the clear stamp is in stock right now, so I have just used that one for my card this time. If you are wondering about the paper pad, I thought that it was great value for money – some fabulously festive designs and the perfect size for A6 cards – no trimming needed! The glitter gems remind me very much of Nuvo glitter drops – but of course no worrying about getting the drops the same size.. or waiting for them to dry! Two really useful products with a great price point!

I kept things simple with my card as the image contains a sentiment already so it would be perfect for using for any batch cards you needed. I embossed the image using white embossing powder and then simply blended distress ink (Antique Linen, Dried Marigold, Victorian Velvet and Seedless Preserves) over it. I used a microfibre cloth to remove ink from the image before splattering some water on top of the scene and blotting the ink dry.

There are some festive fabulous images in this line from Studio Light. I particularly like this Tree and the Reindeer!

Thanks for stopping by!

LucieG.

Products marked with a ‘*’ were sent to me by Crafts-U-Love for this DT assignment.